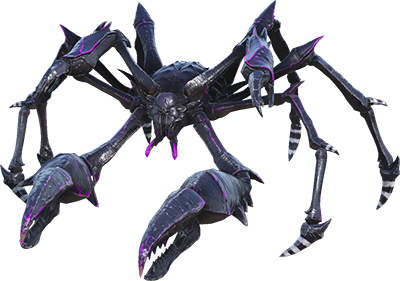
The Karkinos from Ark Survival Evolved
In September 2019, I decided to buy myself a 3D printer.
After shopping around I decided to bite the bullet and buy an "Original PRUSA i3 MK3" 3D printer.
I've always liked toys and over the years, I developed a long list of things I wanted to have but did not exist.... My list contained a variety of items. But before I started to print them I needed to decide of the scale.

For my first project, I decided to go with the Karkinos from Ark Survival Evolved. I liked the game Ark Survival Evolved, the game play of the Karkinos and I thought it had a cool model. I also thought that it would be a nice challenging built to test my early skills.
The Ark IP belongs to Studio Wildcard.
The pieces of software (all free) I used to extract the model from the game engine, to modify it and to print it were:
- ARK Editor (Contains all the models)
- Autodesk Fusion 360 (Free for personal use and the program I used the most)
- Meshmixer (Used to fix the meshes that were giving me headaches)
- PrusaSlicer (Used to slice the stl into gcode for the 3D printer)


 Speaking of accessories, I tried to get accessories that would make me remember the game that I like so much. After searching in the dev kit for a while I decided to get the following models and to make them usable by the Playmobil figures by adding in holes with grasping cylinders for the hands and modifying the chosen helmet so that it fits.
 - The trike bone helmet that looks awesome
- A bag of purple crystals
- A bag of Tintoberry and Narcoberry
- The wrapped package when you drop items in game.


- Take more time when smoothing a model to not loose any important details.
- Have multiple different ball joint sizes for different parts.
- Understand the movement limit/freedom of movement of the placed ball joint and modify them to have the wanted movement/ add more complicated joints if needed.
- Add details to the main model, that would normally be there from computer graphics (bump/normal map), on the model before printing.
- Print in correct orientations and if needed add in snap points if I need to split a piece for better printability (easier to glue afterward).
- Use a plastic color closer to the finished color so that the ball joint and scratches don't stand out

Comments
Post a Comment